Snuffle Mats for Dogs
How to Make a DIY Snuffle Mat—and When to Buy One Instead
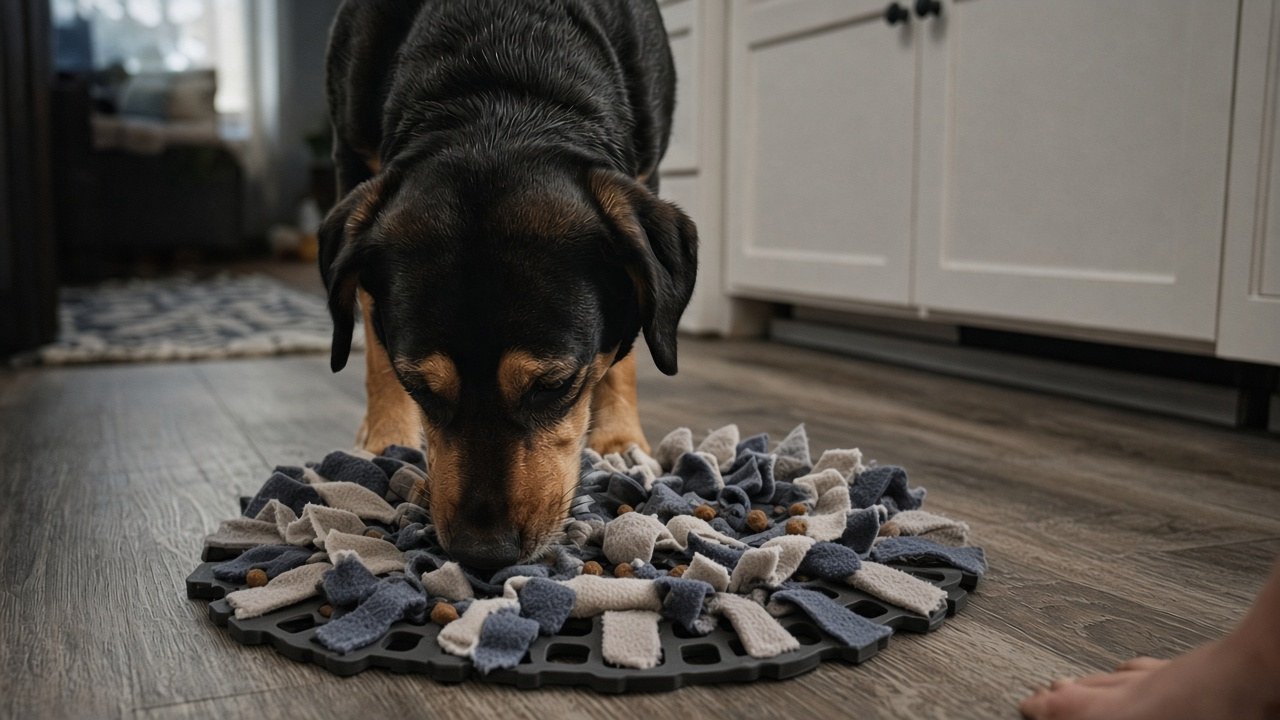
How to make a DIY snuffle mat for dogs: what materials to use, how to tie strips so they stay put, how to wash it, and when a homemade mat is the wrong choice.
A DIY snuffle mat is a homemade foraging mat: usually a rubber base with fabric strips tied or sewn through it, so you can hide dry food and the dog can search with their nose. Making one can be a fair, inexpensive first try.
It is not automatically safer than a store mat. A homemade mat that sheds strips is a hazard, not a bargain. The versions that work are tightly fastened, washable, and used under the same rules as any snuffle mat: supervised at first, picked up when the food is gone, and retired if the dog starts to eat the fabric. The ones that go badly are glued, stapled, or loosely tied, then left with a dog who pulls the strips out.
This guide is about materials, a simple no-sew method, cleaning, and when to buy a finished mat—or skip snuffle mats altogether. It is not a ranked list, and it is not a craft dump. How to run a session, and which dogs should skip the tool, still belongs with the snuffle mat guide.
When a homemade mat is the right project
A DIY snuffle mat is most useful when you want a search, and you can build something that will stay in one piece:
- You want to test nose work before you buy a finished mat, or you are comfortable making a simple one you can wash.
- You can tie or sew the strips so they do not pull free in one tug, and you will inspect the mat after every use and every wash.
- The dog is not already known for shredding and swallowing fabric, fleece, or stuffing.
- You can stay for the first sessions and pick the mat up when the food is gone.
It is the wrong project, or the wrong tool, when:
- The dog already eats fabric or stuffing. Do not make a snuffle mat for that dog. The use guide explains who should skip this kind of foraging; homemade does not change the answer.
- You need a durable, easy-to-clean way to serve every meal. That is usually a slow-feeder bowl, not a denser pile of fleece.
- What you wanted was licking, not sniffing. That is a lick mat.
- You cannot supervise the first sessions, or you will not have time to wash and dry the mat.
- The only fasteners you have are glue, staples, or loose yarn.
A skip is not a failed craft. A bowl is a successful outcome when a mat would become something to swallow.
How to make one without creating a fabric snack
1. Start with the safety rules, not the craft
The safety rules do not change because you made the mat yourself: nothing the dog can pull off and swallow, a design you can wash, and supervised use until you know how your dog treats the fabric.
That means you are building for a food search, not for a toy the dog can tug, shake, and dissect. If a strip can come free in one determined pull, it is too loose. If you would not want the dog to swallow a scrap of the material, do not use that material.
Use dry kibble or dry treats, counted as part of the day’s food, just as you would with a store mat. Wet food in a homemade fleece mat is a hygiene problem unless you are there and can wash it immediately.
2. Choose materials that can be washed and inspected
The usual no-sew build is a sturdy rubber mat with a grid of holes, plus fleece cut into strips.
The base should be stable, washable, and thick enough that a large dog cannot fold it up and chew the edge to pieces. A rubber sink-style mat with holes is the common choice. Skip a cracked base, a mat with a backing that cannot get wet, or a decorative doormat full of glue and fibers.
Fleece is the usual fabric because cut edges fray less than many cottons or old t-shirts. Use clean fleece without metallic threads, beads, or decorations. Skip yarn, ribbon, and loose string as the searching layer: they can wrap or be swallowed in long lengths. Skip old clothing that still has buttons, snaps, or zippers.
Do not use staples, pins, or glue as the only thing holding the strips on. Glue fails in the wash and in a wet mouth. Staples and pins are something to swallow.
You do not need a long materials list. A sound base, fleece you can cut, and scissors are enough for the no-sew method.
3. Tie the strips so they stay put
Cut fleece into strips wide enough to knot without shredding—about an inch or two is typical—and long enough to go through a hole, tie a tight knot, and leave only short tails. Long, dangly ends are easier to grab and pull out. Tiny, skinny strips are easier to swallow if they come loose.
The usual knot is simple: fold a strip in half, push the loop down through a hole, then pull both ends through the loop and cinch it tight against the mat. Work across the grid until the rubber is covered enough that the dog is searching in fleece, not just licking crumbs off bare rubber. You do not need every hole packed so densely that the mat cannot dry.
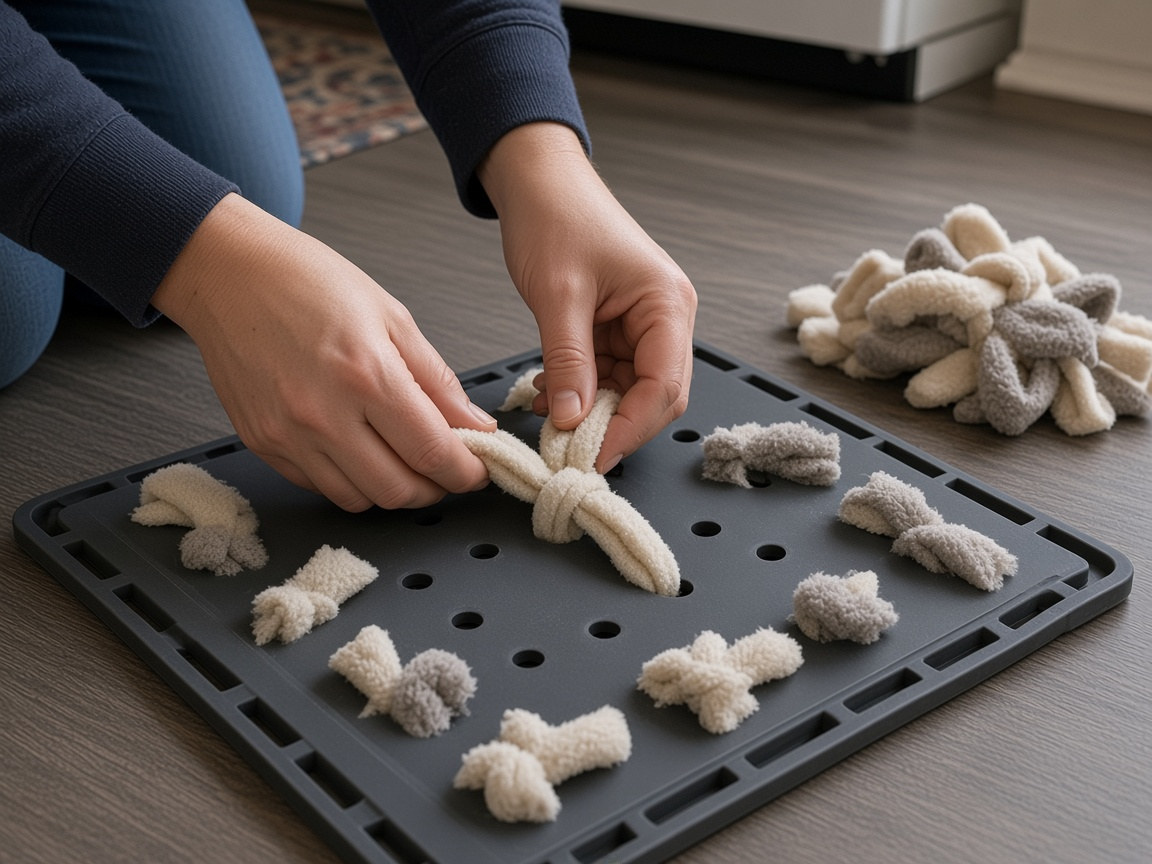
Cinch each knot, then tug it the way a dog would. If it slips, retie it or use a slightly wider strip. Trim the tails short, but not so short that the knot can work itself loose. There should be no beads, no extra ties of string, and no dangling loops the dog can get a jaw or limb through.
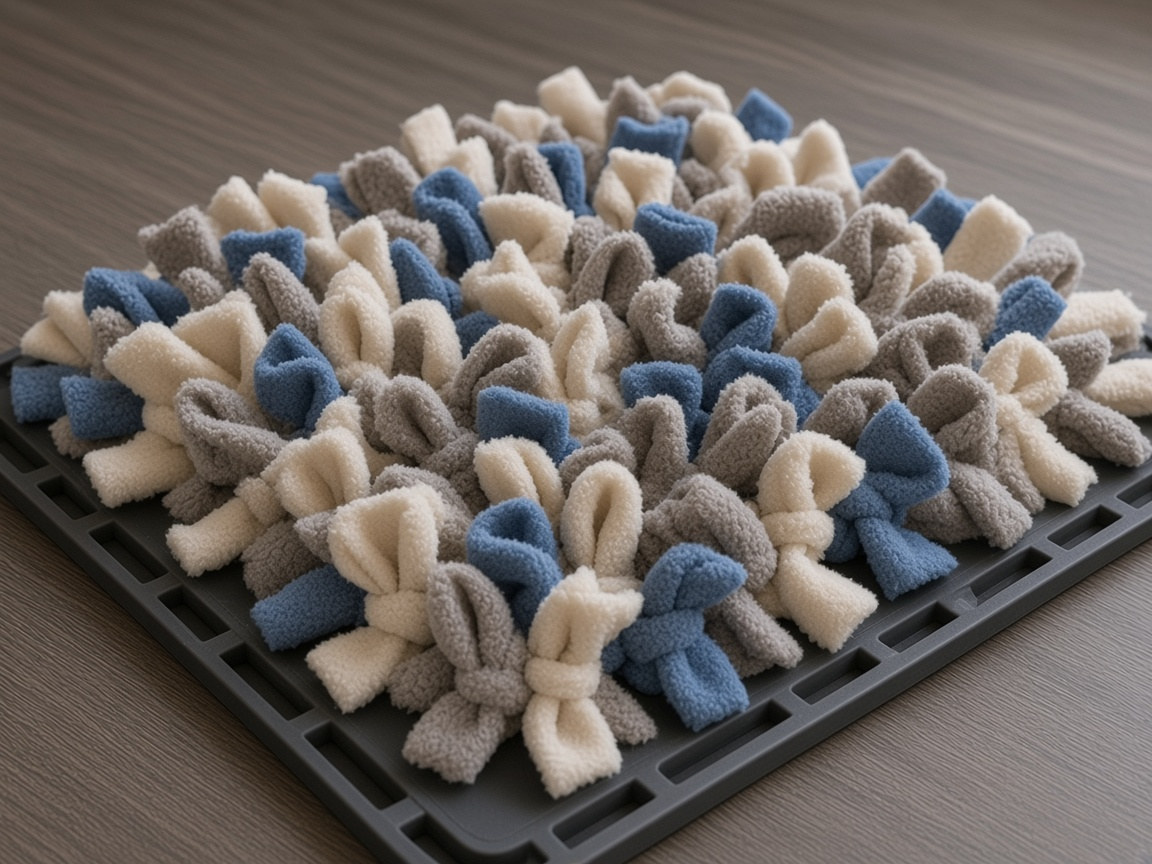
If you sew instead, stitch strips or loops securely to a washable base, with no loose notions, and check the seams after every wash. Sewing can outlast loose knots if it is done well. It is not safer if the thread pops and leaves a mouthful of fabric.
4. Match the size to the dog and to your sink
The mat has to be large enough for a real search and small enough to wash and dry. A tiny mat under a large dog is frustrating and easy to pick up and shake. A huge rug of fleece is hard to clean and slow to dry. Large dogs need a sturdier base and knots that can take more force, not just more fabric. Puppies need the same secure construction, plus closer watch so the mat does not become a teething chew.
5. Inspect it, then run the first session like any snuffle mat
Before the first search, turn the mat over, check every knot or seam, and shake it. If anything is already loose, fix it or start over.
Use a small amount of the dog’s usual kibble, with some pieces visible on top so the first search is easy. Stay in the room. The session ends when the food is gone, or sooner if the dog starts to mouth the strips, pull at the base, or guard the mat. Pick it up. An empty homemade mat left on the floor is a chew, just like a store mat.
How to introduce the search, how long a session should last, and which dogs should stop, is covered in the snuffle mat guide. Do not skip those steps because you made the mat yourself.
6. Wash it, dry it, and retire it when it comes apart
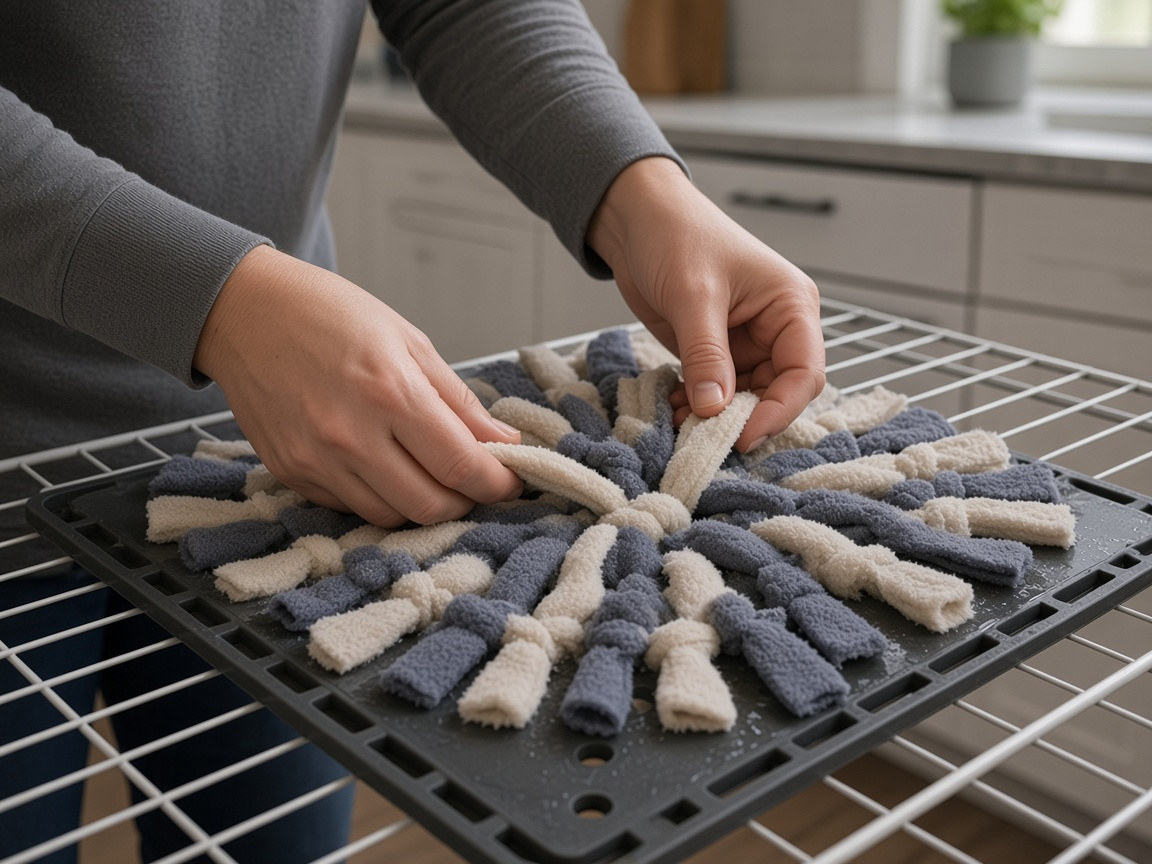
Shake out crumbs after each use. Then wash the mat so food and saliva do not sit in damp folds. Use a method the rubber and fleece can handle, and let the mat dry fully before the next session. A damp homemade mat in a heap is the same hygiene problem as a store mat, and the knots can hide moisture.
After every wash, check the knots or seams again. Retie or repair what you can. If strips are coming free, the base is cracking, or you keep finding wet scraps, retire the mat. A homemade snuffle mat is not “still good enough” when it is shedding.
When to buy a finished mat instead
Making one is a test and a project, not a requirement.
Buy a finished snuffle mat, or stop making this one, when you cannot fasten the strips securely, when the mat comes apart after a wash or two, or when you do not have time to inspect and repair it. A well-made store mat is doing the same job. You still have to supervise early sessions, wash it, and pick it up—the use guide does not change.
If the dog eats fabric, do not “upgrade” to a store mat and hope the stitching will hold. Skip the tool and use something the dog cannot shred, such as a slow-feeder bowl. If the DIY mat stays intact and clean, you can keep using it. You do not have to buy one because the first search went well.
Common mistakes
Using glue, staples, or loose yarn, then hoping the wash and the dog will be gentle. Fasten the strips so they stay put, or do not make the mat.
Leaving long tails or loose loops the dog can grab, or packing the mat so densely it cannot dry.
Never washing it, or putting it away damp. It holds food. Treat it that way.
Leaving the mat out after the food is gone, or leaving a new homemade mat with a dog you have not watched around fabric.
Building a mat for a dog who already swallows fleece, then calling it enrichment.
Treating a successful DIY session as a reason to skip the questions any snuffle mat still has to answer: supervision, washing, and which dogs should not forage this way.
Offering one mat to two dogs and walking away.
How a DIY mat differs from nearby options
A DIY snuffle mat is the same job as a store snuffle mat: a nose-down search for dry food in fabric. The difference is construction and upkeep. You are responsible for the knots or seams, and you should be quicker to retire it if it starts to fail. It is not a different kind of enrichment.
A lick mat is for licking a smear of food. Do not treat a fleece foraging mat as a lick surface, and do not build a snuffle mat when what you wanted was a washable tray.
A puzzle toy is for problem-solving. A slow-feeder bowl is for slowing a meal with less fabric and less theater. After a flirt pole or a game of fetch, an easy search can help the dog come down—whether the mat is homemade or store-bought—as long as it stays in one piece.
A simple way to try one
- Use a sturdy rubber mat with holes and clean fleece. Skip glue, staples, and anything with buttons or long string.
- Tie each strip with a tight knot and short tails, then tug it. Cover enough of the base for a search, without making a mat you cannot dry.
- Shake the mat out, inspect it, and start with a few pieces of usual kibble in plain view. Stay in the room.
- When the food is gone, pick the mat up, shake out crumbs, wash it, and let it dry fully. Check the knots again.
- If the dog searched and left the fabric alone, you can use it again. If strips loosen, the base cracks, or the dog starts to shred, retire it. Buy a finished mat only if you still want this job and can keep the same safety rules—or switch to a bowl if fabric is the problem.
If the dog ignores the mat, make the first search easier before you assume they will never use one. If they go straight for the strips, this is not their tool, and making a second, thicker mat will not fix that.
FAQ
Can I make a snuffle mat at home?
Yes. A common DIY snuffle mat is a rubber mat with holes and fleece strips tied tightly through it. You can also sew strips to a washable base if the stitches are secure. The safety rules do not change: nothing the dog can pull off and swallow, a design you can wash, and supervised use until you know how your dog treats the fabric.
What materials do I need?
A sturdy rubber mat with a grid of holes, fleece you can cut into strips, and scissors. Skip staples, pins, beads, buttons, rubber bands, and glue as the only fastener. Avoid old clothing with zippers or weak seams, and avoid yarn or string that can wrap or be swallowed in long lengths.
Do I have to sew a DIY snuffle mat?
No. The usual no-sew method is to tie fleece strips through the holes of a rubber mat with tight knots and short tails. Sewing can be more durable if you can stitch securely to a washable base. Either way, inspect the mat after every wash, and retire it if strips loosen or come off.
How do I keep my dog from pulling the strips out?
Tie or sew them so they cannot be pulled free in one tug, keep the tails short, and watch the first sessions. If the dog mouths the fabric, starts to pull strips loose, or swallows pieces, stop and pick the mat up. Construction helps, but it does not make a fabric-eater safe with a homemade mat.
How do I wash a homemade snuffle mat?
Shake out crumbs after use, then wash the mat so food and saliva do not sit in damp folds. Use a method the materials can handle, and let it dry fully before the next session. After each wash, check every knot or seam. Skip wet food unless you are there and can wash the mat right after.
Is a homemade snuffle mat safer than a store one?
Not automatically. A homemade mat that sheds strips is not safer than a poorly made store mat. Making one can be a fair first try if you can fasten it tightly and wash it. Buy a finished mat if you cannot build something secure, or if your DIY version keeps coming apart.
When should I buy a snuffle mat instead of making one?
When you need something more durable or easier to wash than you can build, when knots or seams keep failing, or when you do not have time to inspect and repair the mat after every use. If the dog eats fabric, skip snuffle mats altogether rather than buying a tougher one.
Can puppies or large dogs use a homemade snuffle mat?
Yes, with the same rules. Puppies need close supervision so the mat does not become a teething chew. Large dogs need enough surface to search and a sturdier construction, so strips and the base cannot be pulled apart in a few tugs. Size and supervision matter more than a label.
Can I leave my dog alone with a DIY snuffle mat?
Not until you have watched enough sessions to know they will not shred or swallow it, and not in a multi-dog space where guarding is possible. Homemade mats deserve the same caution as store mats, and often more, because knots can loosen. Pick it up when the food is gone.
My dog is shredding the DIY mat. Now what?
Stop the session and pick it up. If pieces can be swallowed, retire that mat. A dog that treats the fabric as a chew is not a good match for a snuffle mat, homemade or store-bought. Switch to a slow-feeder bowl or another tool, and do not try to solve it with a denser pile of fleece.